A knife for leather artisans: The Hammerhead

Until now I used a sharp scalpel to cut the leather when making knife sheaths. The disadvantage is that the thin blade snaps pretty easily, especially when forcing the tip of the scalpel around sharp corners.

I thought about buying a half or quarter moon knife (leather round knife) for my work and searched how they are used and what the advantages are.

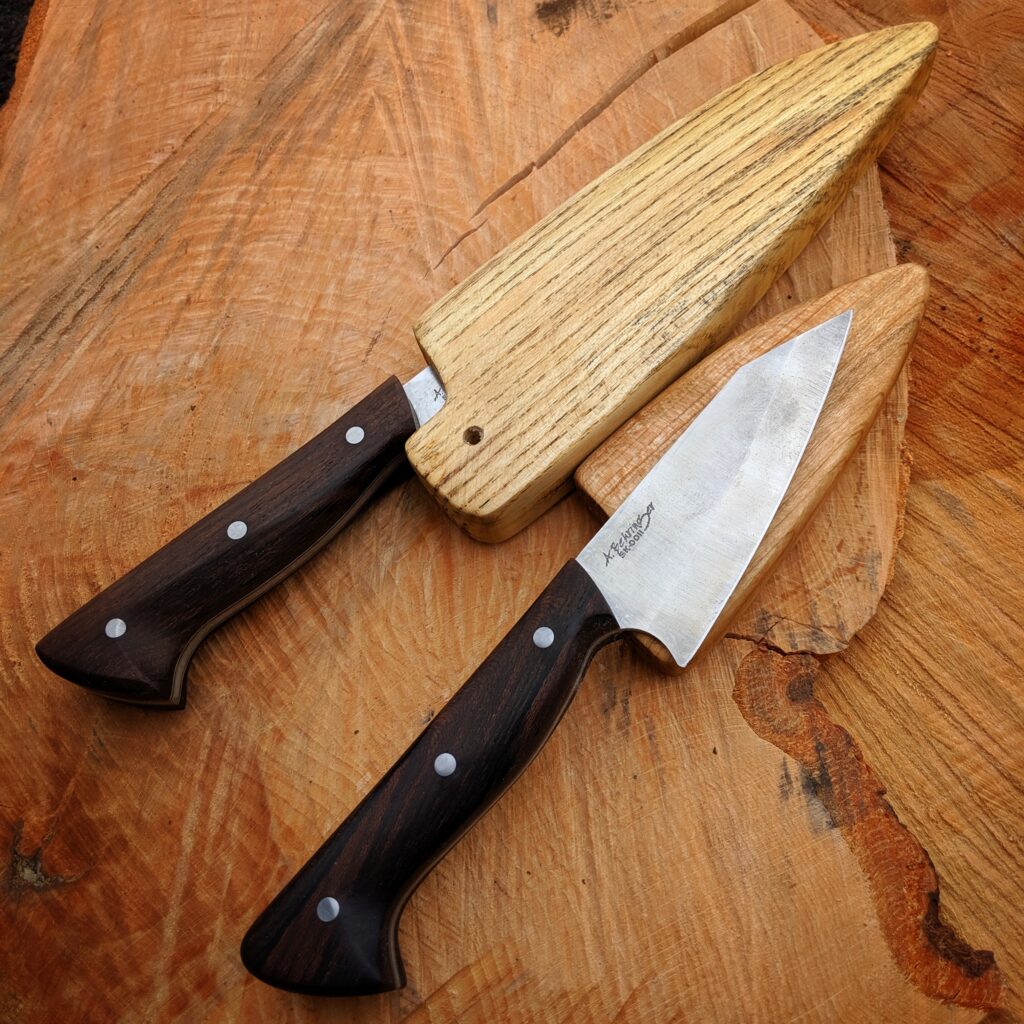
And then I recalled: hell, I am a knifemaker, why don’t I design and make myself a leather knife. So I put some design on paper. I wanted a sharp point on one end of the blade and a circular part of the blade to do rolling cuts and a part of the blade should be suitable for pulling cuts.

Most important would be that this knife is stupid sharp so it would be as good cutting leather as my scalpel does.

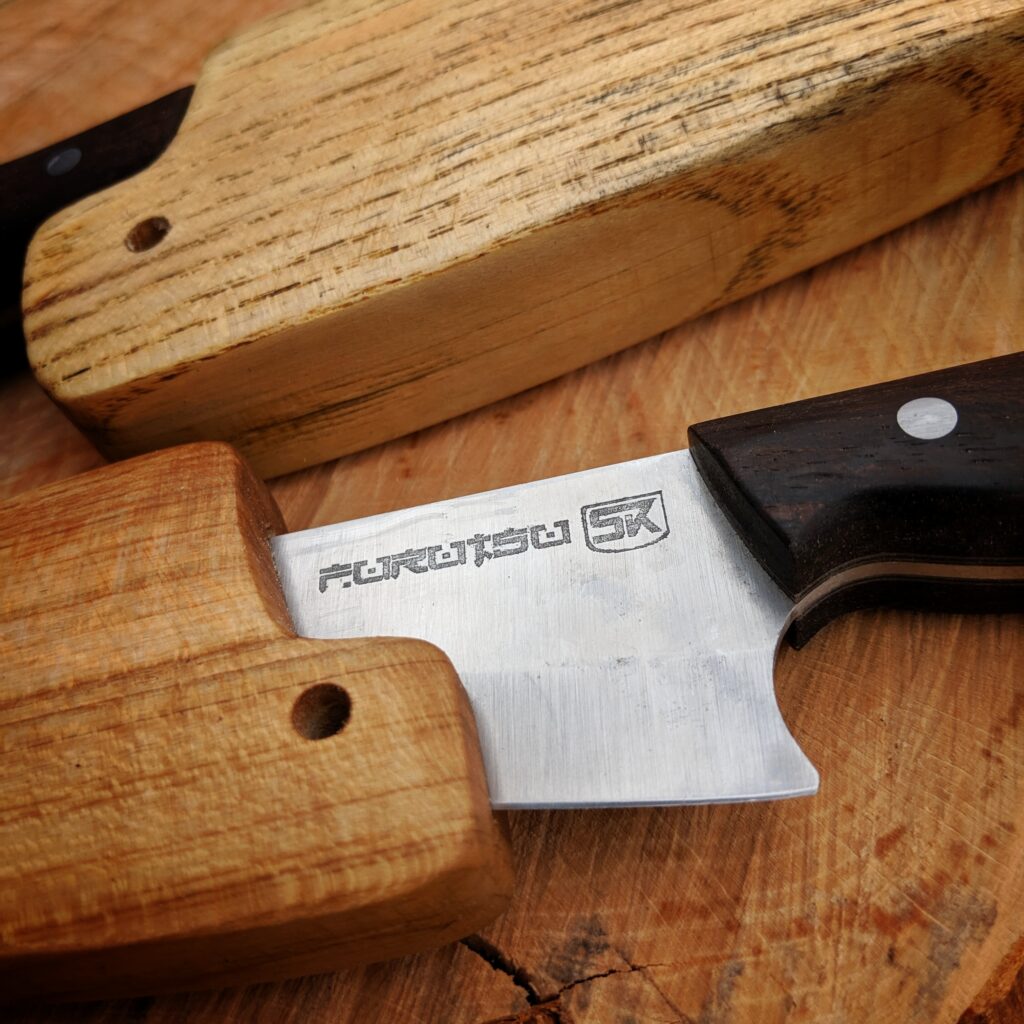
I had so much success with my knife projects so far and not so many failures, that I completely underestimated how hard it is to grind the bevels of such a complicated blade. I guess it is not impossible but this knife is no beauty after all. I ended up doing a convex grind for primary and secondary bevel as this helps even out the grinding mistakes. It is difficult to have a consistent angle all around the edge and even harder not to grind into other parts of the blade while concentrating on another. So I consider this grind as my first real failure in regards to beauty. Sharpening went just fine and I have a razor-sharp edge.

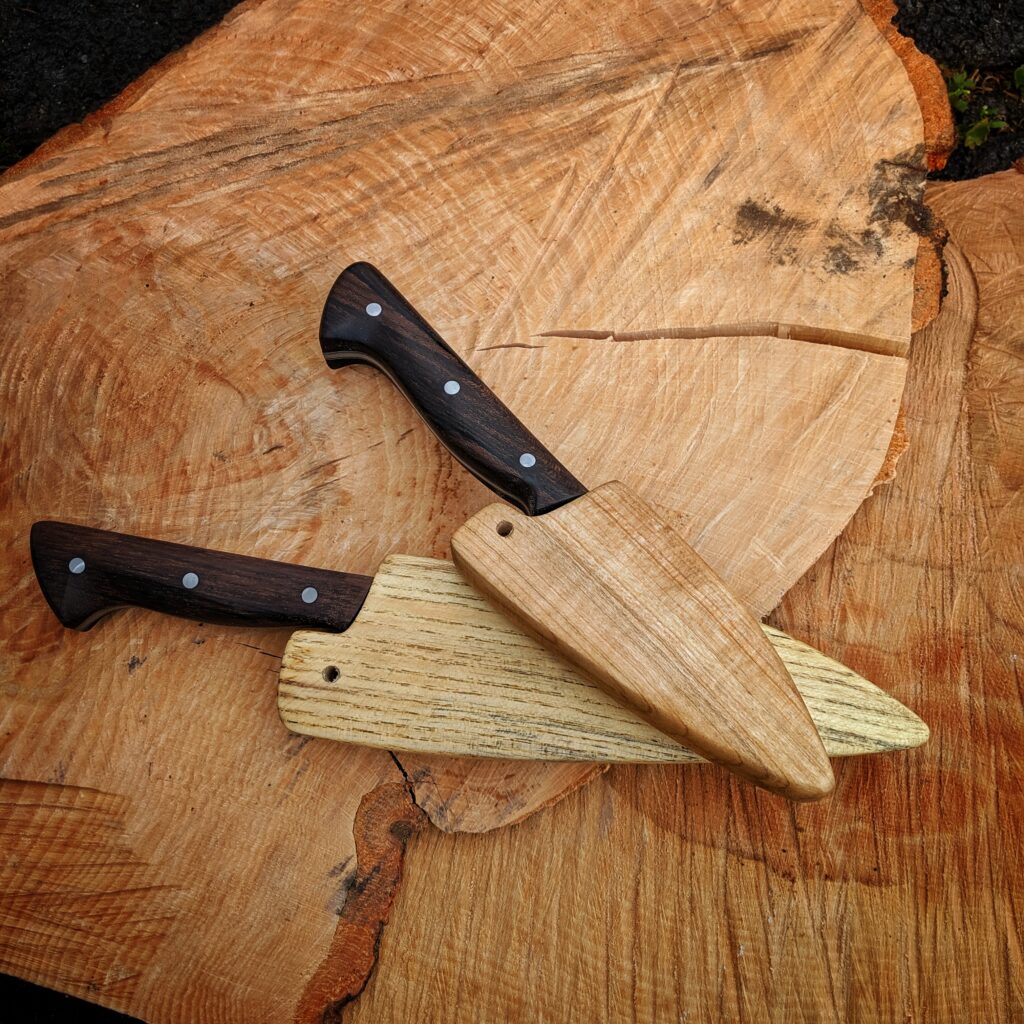
I chose some beech wood for the handle, which I had sawn and dried some time ago. The wood is sufficiently hard and cheap for a prototype tool. I glued the Wood directly to the steel without any micarta liners – something I did never do before, too. But in the end, it looks like a useable tool knife and the first cutting tests are very promising.

My personal knives touch

I like the forms and styles that have a character. I like designs that are remembered. I like unique blade designs that give new opportunities. I am still developing my own personal style but some things drive me when designing a new knife.

The blades

Even the most meticulously made blades I make should be practical to use and durable. I am not making “Show-Only” knives that only look good hanging at the wall. I like recurved designs and blades with lots of character. I like doing crossover designs that combine two well-known styles into something new or combine old and modern styles. I like the blade to have a weight and when in doubt I tend to use thicker steel. Currently, I am addicted to carbon steel and love the knives getting character and develop a patina, a personality. I love tools and knives that have to be cared for like a gun, cleaned and oiled. It is like getting into a relationship with a knife as a companion.

The handles

The handles must feel ergonomic and comfy in the owner’s hand. Soft to the touch but robust hand tough when in heavy use. But he still should feel the knife, the weight and the capabilities of the blade. I want the handle to give a level of safety and confidence to the owner. The form should always serve a purpose. The thick heels of many of my knife handles give a good feeling that you have a secure grip while hacking with the blade or doing pulling cuts. Finger guards save the owner from slipping into the sharp edge. The form even should provide good handling when just picking the knife up with two fingers.

The sheaths

What applies to blades and handles also applies to the sheaths. They serve a purpose and that is a practical one. They are not only for show, but they should also be practical. They should protect the owner from cutting himself and most of all should be perfect for carrying the knife. I also like to go new ways of designing my sheaths to suit my knife designs perfectly. I like using thicker leather to have a robust product with years and years of use for the owner. I treat the sheaths with dye and a leather fat normally used for outdoor boots to protect the leather.

As the above is important to me I also added it to my About page.

Making a Saya for Japanese kitchen knives

I made the Kengata Santoku Chefs Knife for my mother this year and later a Petty Knife for her birthday too. She loves the knives because they are handy and extremely sharp. She handles them with much care and oils them after every use. But she had no good place to store them.

So my father made her a primitive knife sheath out of some scrap leather he had lying around. He just folded it around the spine of the blade and roughly sewed it shut with a thick nylon thread below the edge. I just finished my third knife sheath but sorry dad, this thing looked like crap 😉

My first impulse was to make two more leather sheaths but hey, these are Japanese style kitchen knives and did I do a Saya yet? No? So it was about time!

A Saya (the Japanese word for Scabbard) is a wooden knife (or better sword) sheath that I had seen made for kitchen knives too. So my chance to try out making one (or two) had come.

I wanted to start from real basic and cut the wood out of some piece of firewood I keep in my garage for our oven. I also decided to do Sayas for both knives, the Kengata Santoku, and the Furutsu. So I cut two thick boards.

Each Board I cut in three layers with the outer of equal thickness and the inner as thin as possible, about 0,5 cm. On the inner board, I drew the outline of the blade and cut this out. So I had a wooden frame that fits exactly around the blade of the knife. This frame I glued to one side of the other boards again. Before I used the frame as a stencil to draw the shape of the blade on top of the board that would be a side element. The outline would be needed later.

After the glue had dried I put a strong neodymium magnet in at the tip of where the blade would end and then I cut away some millimeters of the thickness of the frame on the band saw before I used the belt grinder to thin down the frame close to the 2 millimeters of the blade thickness. I drilled a 5-millimeter hole through one side. After I evened out the frame side and the remaining board I glued them together as well.

As I had the outline of the frame on one side of the glued up sandwich I added about a cm to the outline and cut that out on the bandsaw. The rest was grinding everything in shape on the belt grinder.

Just when grinding the Sayas to a finer grain I noticed that I accidentally used two different types of wood.