Knife No. 10 – An interim conclusion

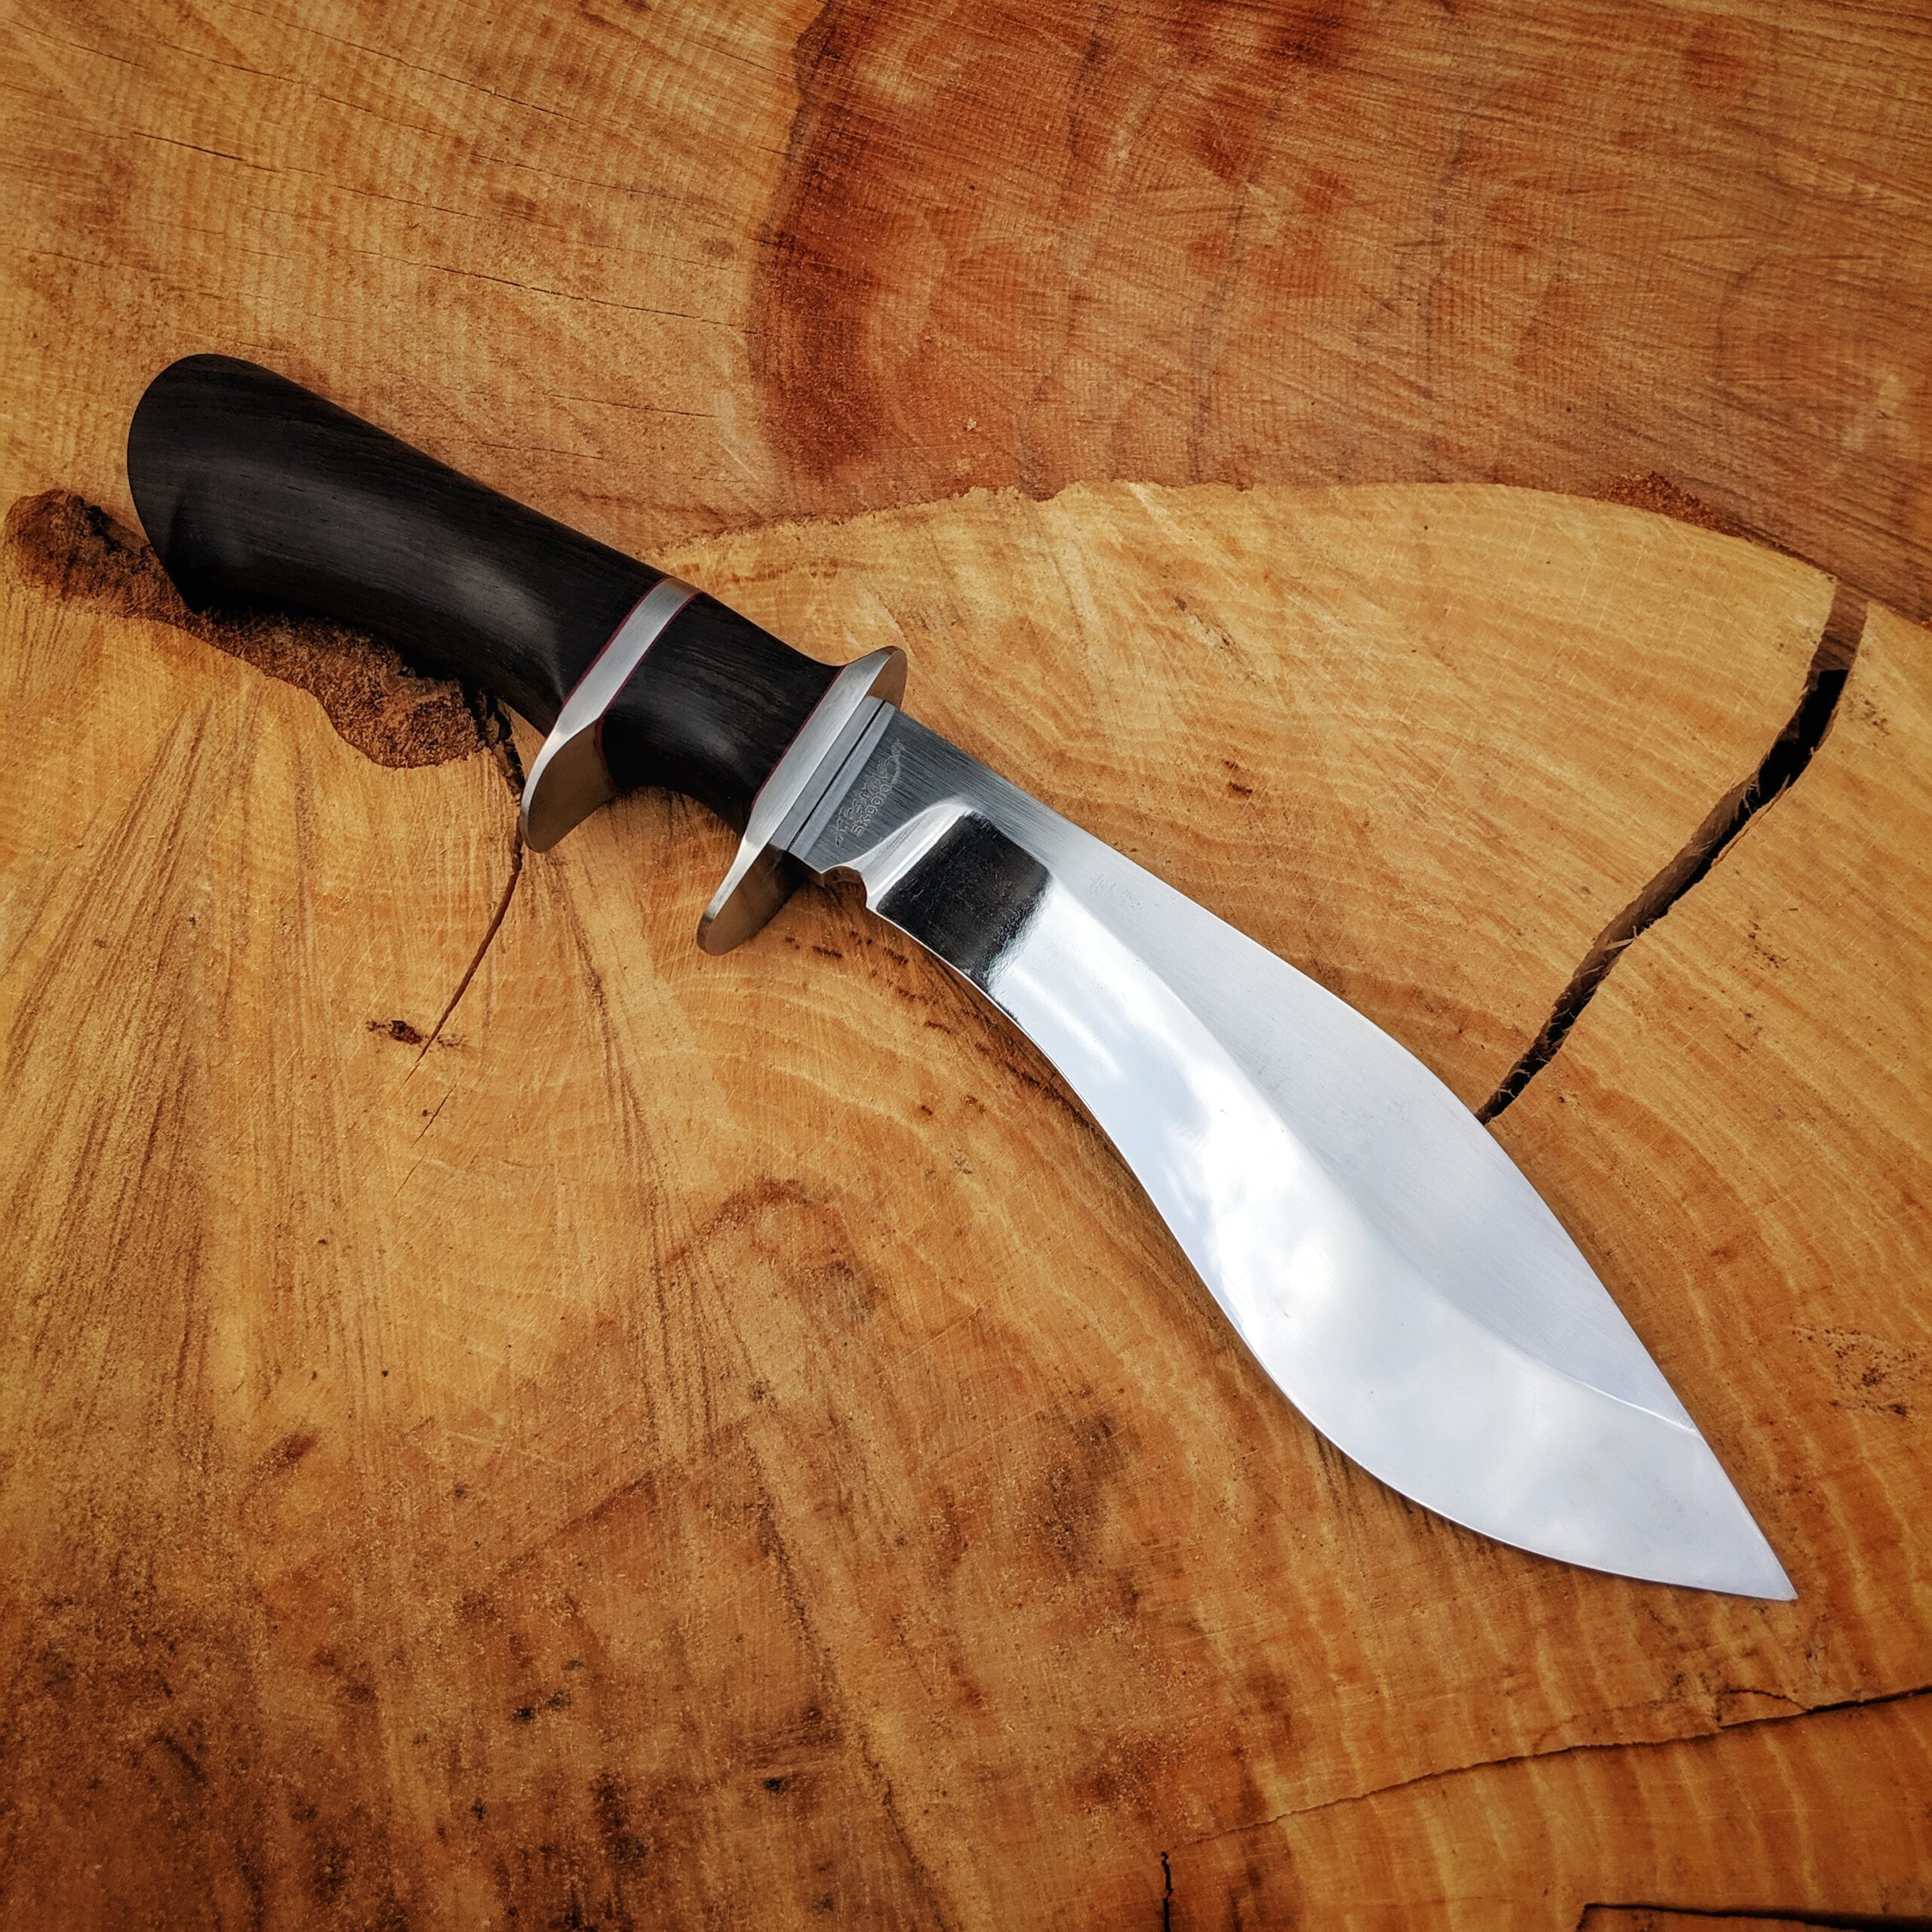
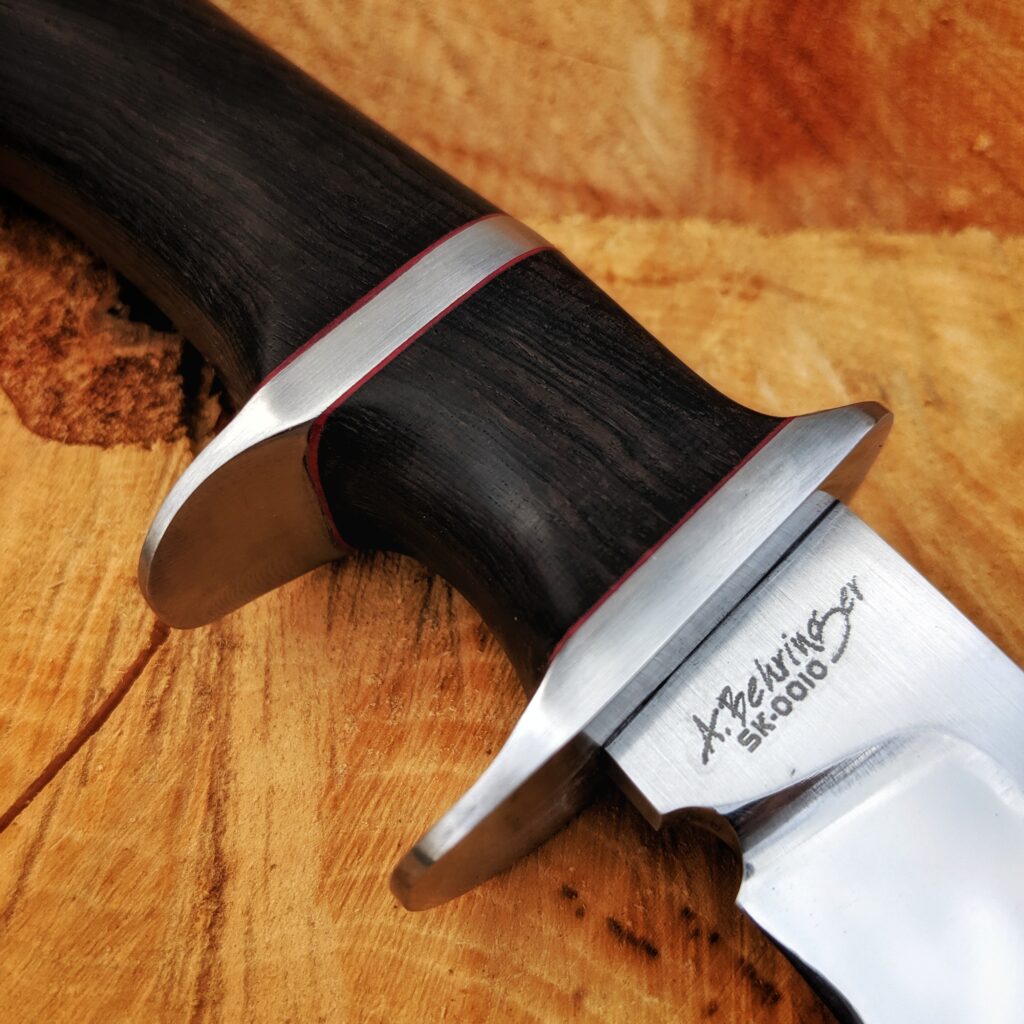
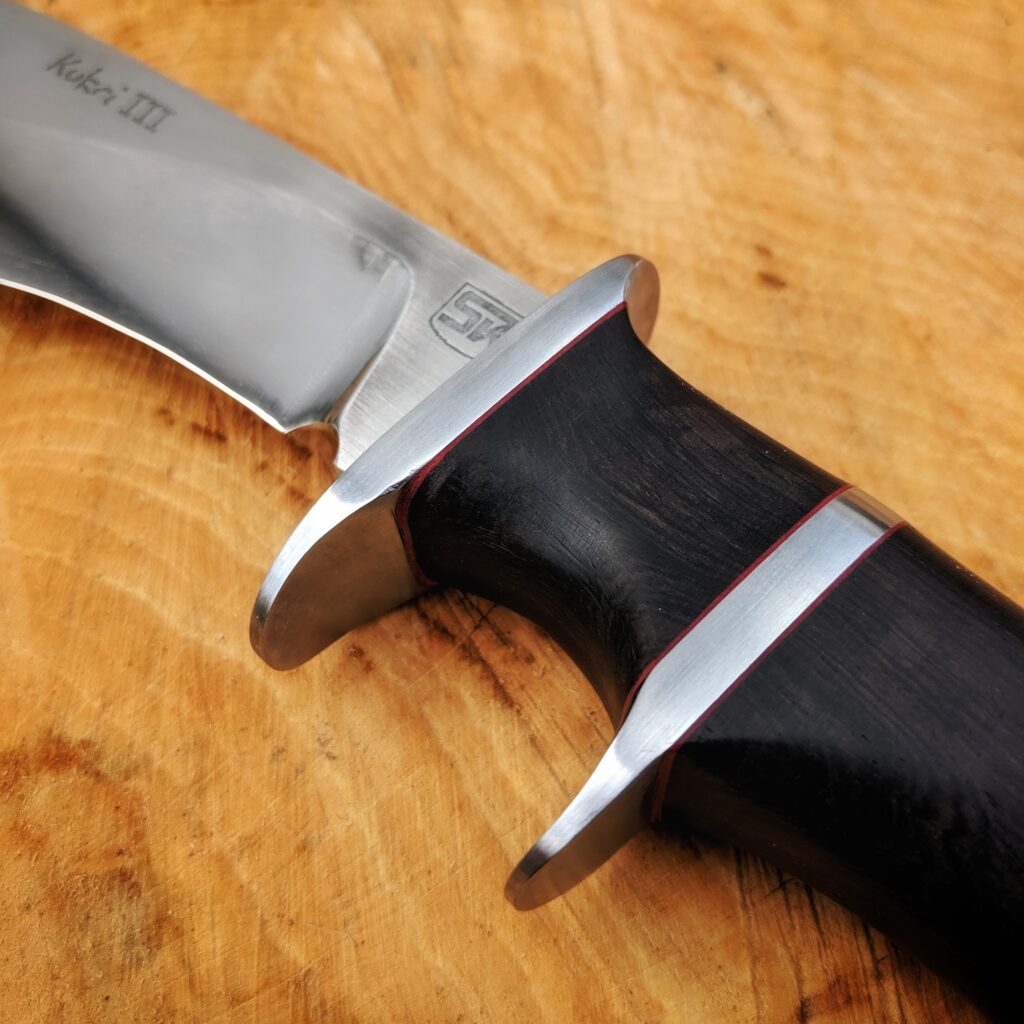
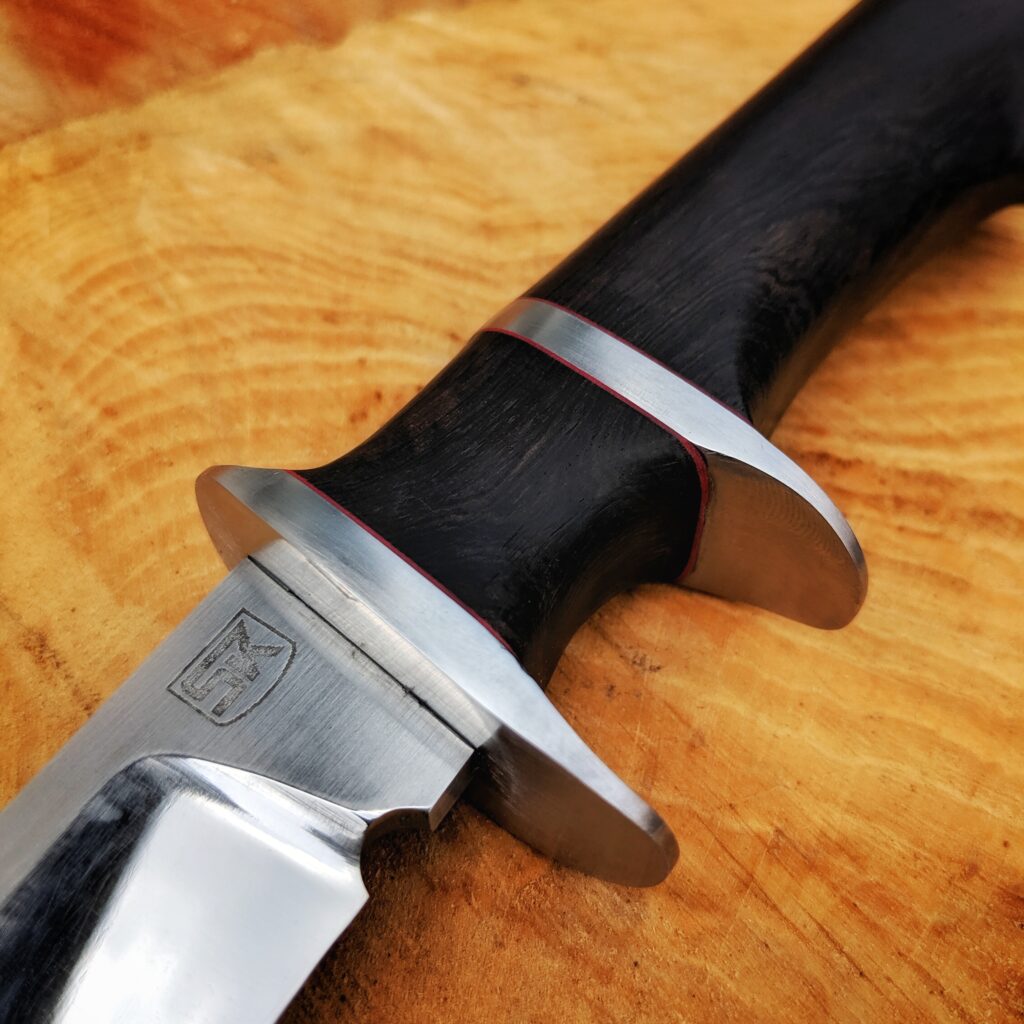
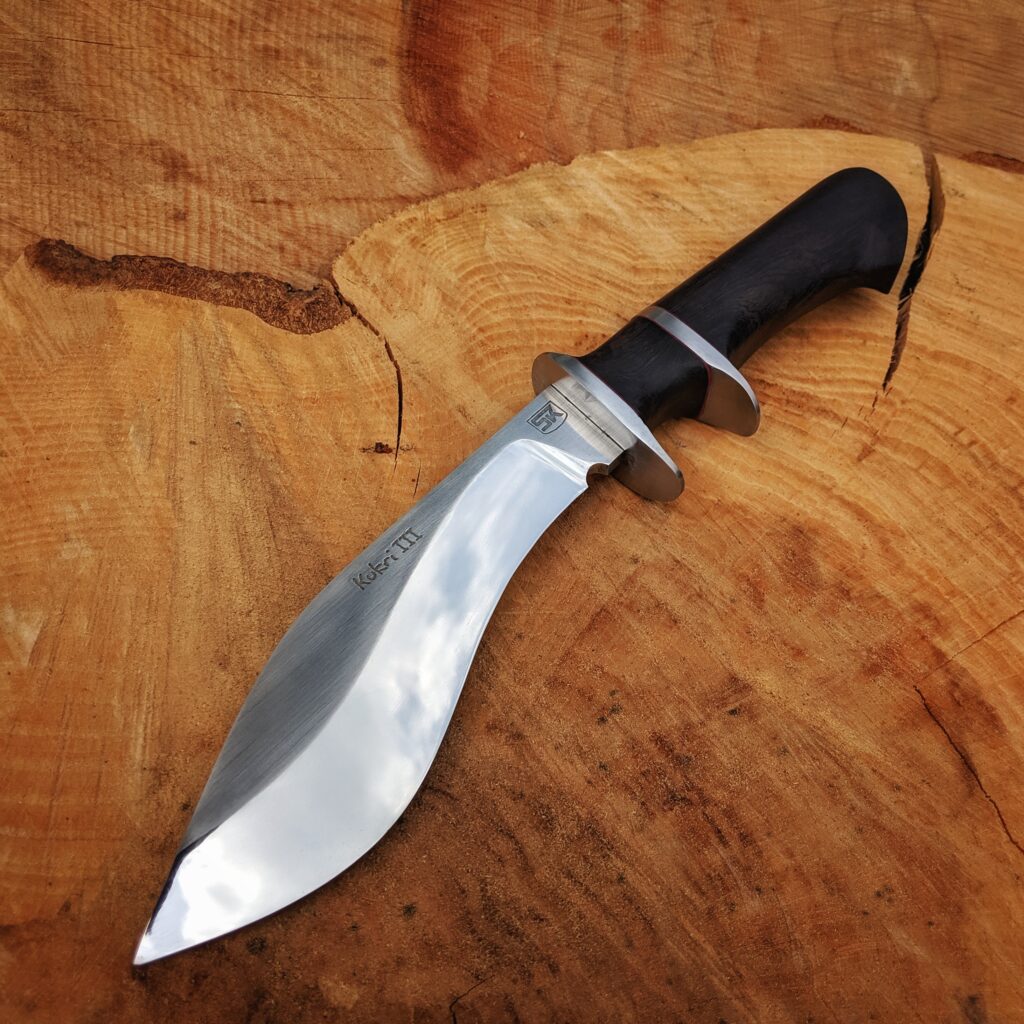
I just finished my tenth knife and it is here in front of me on my desk together with its polished leather sheath. I started making knives last year in October 2018. For my birthday I got my little belt grinder where I did all ten knives on. I tried out my first knife shape, that I quickly drew on a piece of aluminum, just to get a feeling. This was the birth of my first knife that I know call the Signature blade, my EDC.

I think it is a good time to take a quick look over my shoulder and summarize what happened so far.

The journey and pace is breathtaking on one side and slow and relaxing on the other Side

I learned an insane amount of techniques: cutting steel to the desired shape, hardening and heat-treating it, full and hidden tang constructions, making guards and sub hilt style handles, laminating my own paper micarta, working with expensive woods, glueing everything tightly together, surface finishes of the blades and the handles, making my own handle scales out of wood I salvaged in our garden, leatherworking, saddle-stitching, edge burnishing, and so much more in the details and how to do these things correctly. That is breathtaking and there is so much more to learn.

What was breathtaking too is the work together with my friend and first customer Joe from the US. He helped me push the borders of what I can do and push myself harder to get a better and professional result out of my work. Perfect is just good enough for me. Thank you for that and all your support Joe.

The first ten knives were just a start. The good news is: I get more and more inquiries about custom knives. I am very happy about this and it is an indication that the knives I make are good. Unfortunately what I also learned from that is, that the people have no idea what it means to put 20 or more hours into a single handmade product. Some are really astonished when we start talking about prices. Not bearing in mind I have to pay for materials, tools, and machines and till then I did not even earn any money.

And then there is the slow and relaxing part of knifemaking. Designing blades, putting them in steel, hardening, hand sanding, handle sculpting and finally having a finished product in hand to admire – that is satisfying and a relief. That’s why I don’t let anyone rush me. That is what I love so much.

Another awesome part of this work is the knife community all over the world. I am especially active on my Instagram account and the support and help, the appreciation, the communication with similarly interested people all over the world is a great experience.

My main goal is to keep the passion I feel for what I am doing. To find the perfect balance between pushing myself and enjoying my time.

I am planning to split up my work in the future in two different ways of making business:

  • My main part of work will be building knives and trying out new things as they cross my path and putting the knives on stock/display.
  • The other part will be fully customized knives where the buyer has the option to influence every detail – as far as technically possible for me. This

I’m planning a third way – so far just an idea in my head. If I have come to a conclusion, I will publish it here. So stay tuned I like the idea.

Making the sheath for the Kukri III

I did a sheath for the Bowie and one for the Hunter, the two knives I made as a Christmas gift for my brother and my father. I used a very thin, sloppy and colored chrome tan leather for them. The next sheath I made was for the JAMZT53 knife. This was also the first time I got the right leather (veg-tan) and did some leather carving and punching to give the sheath a nice looking surface.

Now I just finished the Kukri III and wanted to make a sheath that suits the quality of the knife of my customer and friend Joe. The last time I bought a pretty small piece of leather where the needed sheath parts fit barely on to. Now I looked for a supplier of bigger leather pieces to work with and I found one pretty close to where I live. They are a supplier of professional saddlery stuff. I ordered one square meter and a tube of leather glue.

Unfortunately, the delivery service went pretty rough with my package so that the tube of glue was damaged and some glue spilled into the package. Fortunately, the leather was not affected. But the tube was damaged. I wrote the supplier an E-Mail. Professional as they are I promptly got send a new tube of glue and a kind E-Mail where they said sorry.

This is how it started. Kukris desire a special form for sheaths.

The main problem with sheaths for Kukri knives is that the blade is wider at the tip, so I needed to make a form where the blade would slide in easily but would stay in the sheath safely when carried on the belt. I did a similar form for the Bowie of my brother.

The second important thing to think about ist what to make in which order. If you don’t think that to the end, then you can not fasten for example the push buttons later.

But first I had to do the leather punching. I tried all the steps out by making a little sheath for my first “Signature” knife. I just wanted to make a little different pattern for the Kukri and the sheath would also get dyed black to suit the ebony wood handle.

One thing I learned from the little test sheath was: Put tape on the back of the leather before making the leather wet and punching it. This prevents the leather from stretching. A tip I found in one of the plethoras of YouTube Vids I watched about leather works. I did not do this on the little sheath and It stretched about 2 centimeters (!!!) in one direction.

Black dyed sheath with a punched pattern and attached belt loop.

The second thing I learned: leather dye works great – on hands too. You just have a look at it and everything is stained – and it soaks through sponges in no time. Latex gloves solved the problem. Same for the glue, it is working amazingly. Fortunately, the dye and the glue dry very fast when working with them.

Before stitching anything I glued the leather together and the bonding is very tough. The stitching ads some stability and looks great. I decided to go with accented stitching lines and chose a light color for the thread. I bought a set of hole punches but they won’t work through three layers of this thick leather – so I just used them to mark the holes and used my mini drill to put in the holes one by one.

Another tough task was to fit the push buttons. They are not made for such a thick leather and so I needed to thin the leather down at the spots where I wanted them. I hammered a number of them and they got crooked before I had the right thickness of leather.

I bought some more tools like a stitching pony and an edge-beveler. The first one really helps as a third hand while stitching and the second one makes smooth rounded corners that later help when burnishing the leather edges.

The sheath has a folded part at the top of the wide part of the blade. The little sheath I did first also was folded instead of two parts stitched on top of each other. There I found out that I need to add a bit of space between the front and the back half, as the folding of the thick leather needs a bit of extra material. So I took that into account for the Kukri. That did work better but was still a bit tight. The knife now fits in like into a glove and if the leather stretches over time it will still hold the blade securely. Next time I will add some millimeters extra though.

I watched some tutorials on how to do a correct saddle stitch, not hard to do but it adds some extra durability and it looks so clean. Finally, all came together and I cut the leather straps to the correct length. I burnished all the edges that came together in the last step and treated them with beeswax. Last I treated the whole sheath with fine leather fat and I polished it. So the black color came out even better.

I posted some pictures on my Instagram account @simplyknives and my friend Joe, who I made the knife for, was very happy with the result. That is when all the hard work pays off when you hear and feel the excitement that results out of every minute that is spent into that piece of steel, wood, and leather.

Kukri / Khukuri: Kukri III

The second Kukri/Khukuri knife I made. I wanted to give the design a bit of a western touch. The handle is made out of ebony wood in hidden tang construction with a sub hilt. The hilts are accented with red paper micarta liners. The blade is made out of 01 tool steel of german precision production. The knife comes with a black dyed, hand made and punched leather sheath.

My blogpost how I made this knife.

Continue reading “Kukri / Khukuri: Kukri III”

A Kukri to remember

The second knife I ever made was a Kukri and my fascination for these knives is unbroken. Fortunately, I got an order for a Kukri with all the freedom to design and make the knife as I wanted it. That is a lot of trust in my craftmanship from my friend and customer Joe.

So I started designing a western-style crossover between a hidden tang Kukri with a primary guard and secondary guard. I sent the concept drawing to my customer and we agreed on a price so the new project had a go.

One of the most difficult things on a kukri is grinding the complex curves of the bevels. I chose a 5 mm thick 1.2510 steel so there was a lot of material to be removed. I collected the steel dust with some strong magnets and put it in a cup that filled up quite high.

The Kukri III will have a blade that is 1 cm longer than Kukri II and the blade will be a lot thicker. What helped me a lot was, that I found a new type of belts for my little grinder which removes a lot of material and reduces the time I need to grind the blade into shape.

After the bevels where finished, I got my professional belt grinder which would have made things a lot easier – but fortunately, it still helped to give the blade a nice surface finish. I am looking forward to using the grinder for bevels on my next knives.

For the handle, I bought a piece of nice black ebony wood. This wood is so heavy but also so beautiful. The piece seemed to have a perfectly even structure.

Ebony wood for the handle. So heavy but also so beautiful.

This project took me ages and a lot of work I spent was put into the surface finish of the different parts. If I do such a project it has to be the best I can and I always ad a detail I never did before. Here I added three things, first I never worked with ebony wood – and boy this stuff is hard. Second I did a long secondary guard and I wanted to have red liners on this hidden tang handle.

The surface finish of the blade took me very long. I wanted to have mirror finish bevels and a scratch pattern on the rest of the blade. It was hard to get to the mirror finish and I blame it on the steel that was hard to grind after heat treatment. But finally, I got it to a degree I was happy with. The etching and regrinding of the blade went perfectly.

The second thing that took a long time was the secondary guard. Shaping the handle after putting everything together is pretty hard to do because it is easy to scratch the guard. Then you redo the surface finish of the steel of the guard but have to watch that you do not touch the wood again. In the end, you want a silky touch handle and a guard with a nice scratch pattern. This is also hard to do on the inside of the primary guard, too.

The third thing was the liners. I never did a hidden tang with liners between steel and wood. But the idea of having red lines between the shiny steel and the black wood was intriguing. So I tried and it came out well. By the way: gluing up a handle of four parts – plus laminating the paper micarta in place between the parts was a bit nerve-wracking. And after everything is put together you cannot really see if everything is lined up perfectly. So I used a rubber band as a centerline marker to line things up.

After all, I am pretty happy with the results and I learned a lot. Ebony is an awesome material and gives the knife a very exclusive touch. The next step is the leather sheath, but this will be an extra post…