My second knife, a Kukri/Khukuri

Before I even started to make the handle of my first knife, I began to make a bigger second knife. I am a big fan of a computer game series and I am playing an older title where Kukri or Khukuri Knifes play a big role in the game as one of the main weapons. So why not try and build one my own. I wanted to take a more compact and modern approach.

As I work a lot with computers and graphics it was clear I wanted to do the designs using a graphics program. First I thought about using dedicated CAD tools but I decided to go the easy way and chose Inkscape. I did some sketches and printed them out to get a feeling for the real dimensions of blade and handle and the details. It is easy to draw things but then I had to figure out how to do these things with steel. So I ended up doing some design iterations on paper.

I transferred the form onto my 1.2003 Steel and cut it out with my angle grinder. Everything went fine. I even was bold enough to try free hand grinding the bevels, yeah on my second knife with a strongly recurved edge… I did it on the slack part of my grinding belt and I was very happy with how much control I got instead of the flat part of the belt – the result were strongly convex grinded bevels. I hardened in my improvised forge out of porous concrete and a gas torch I fixed to the upper wall. The file did not bite into the steel so I am convinced the steel reached it desired hardness.

One thing I did before hardening was a very intense hand sanding and I put lots of effort into a nice surface finish. I did that again after the hardening and before tempering the steel. So I had to do it again after the steel came out nice and golden after one hour of its 200°C temperings in our kitchen oven. That is a lot of sanding and I am sure that is stupid to do. I keep that in mind for my next knife.

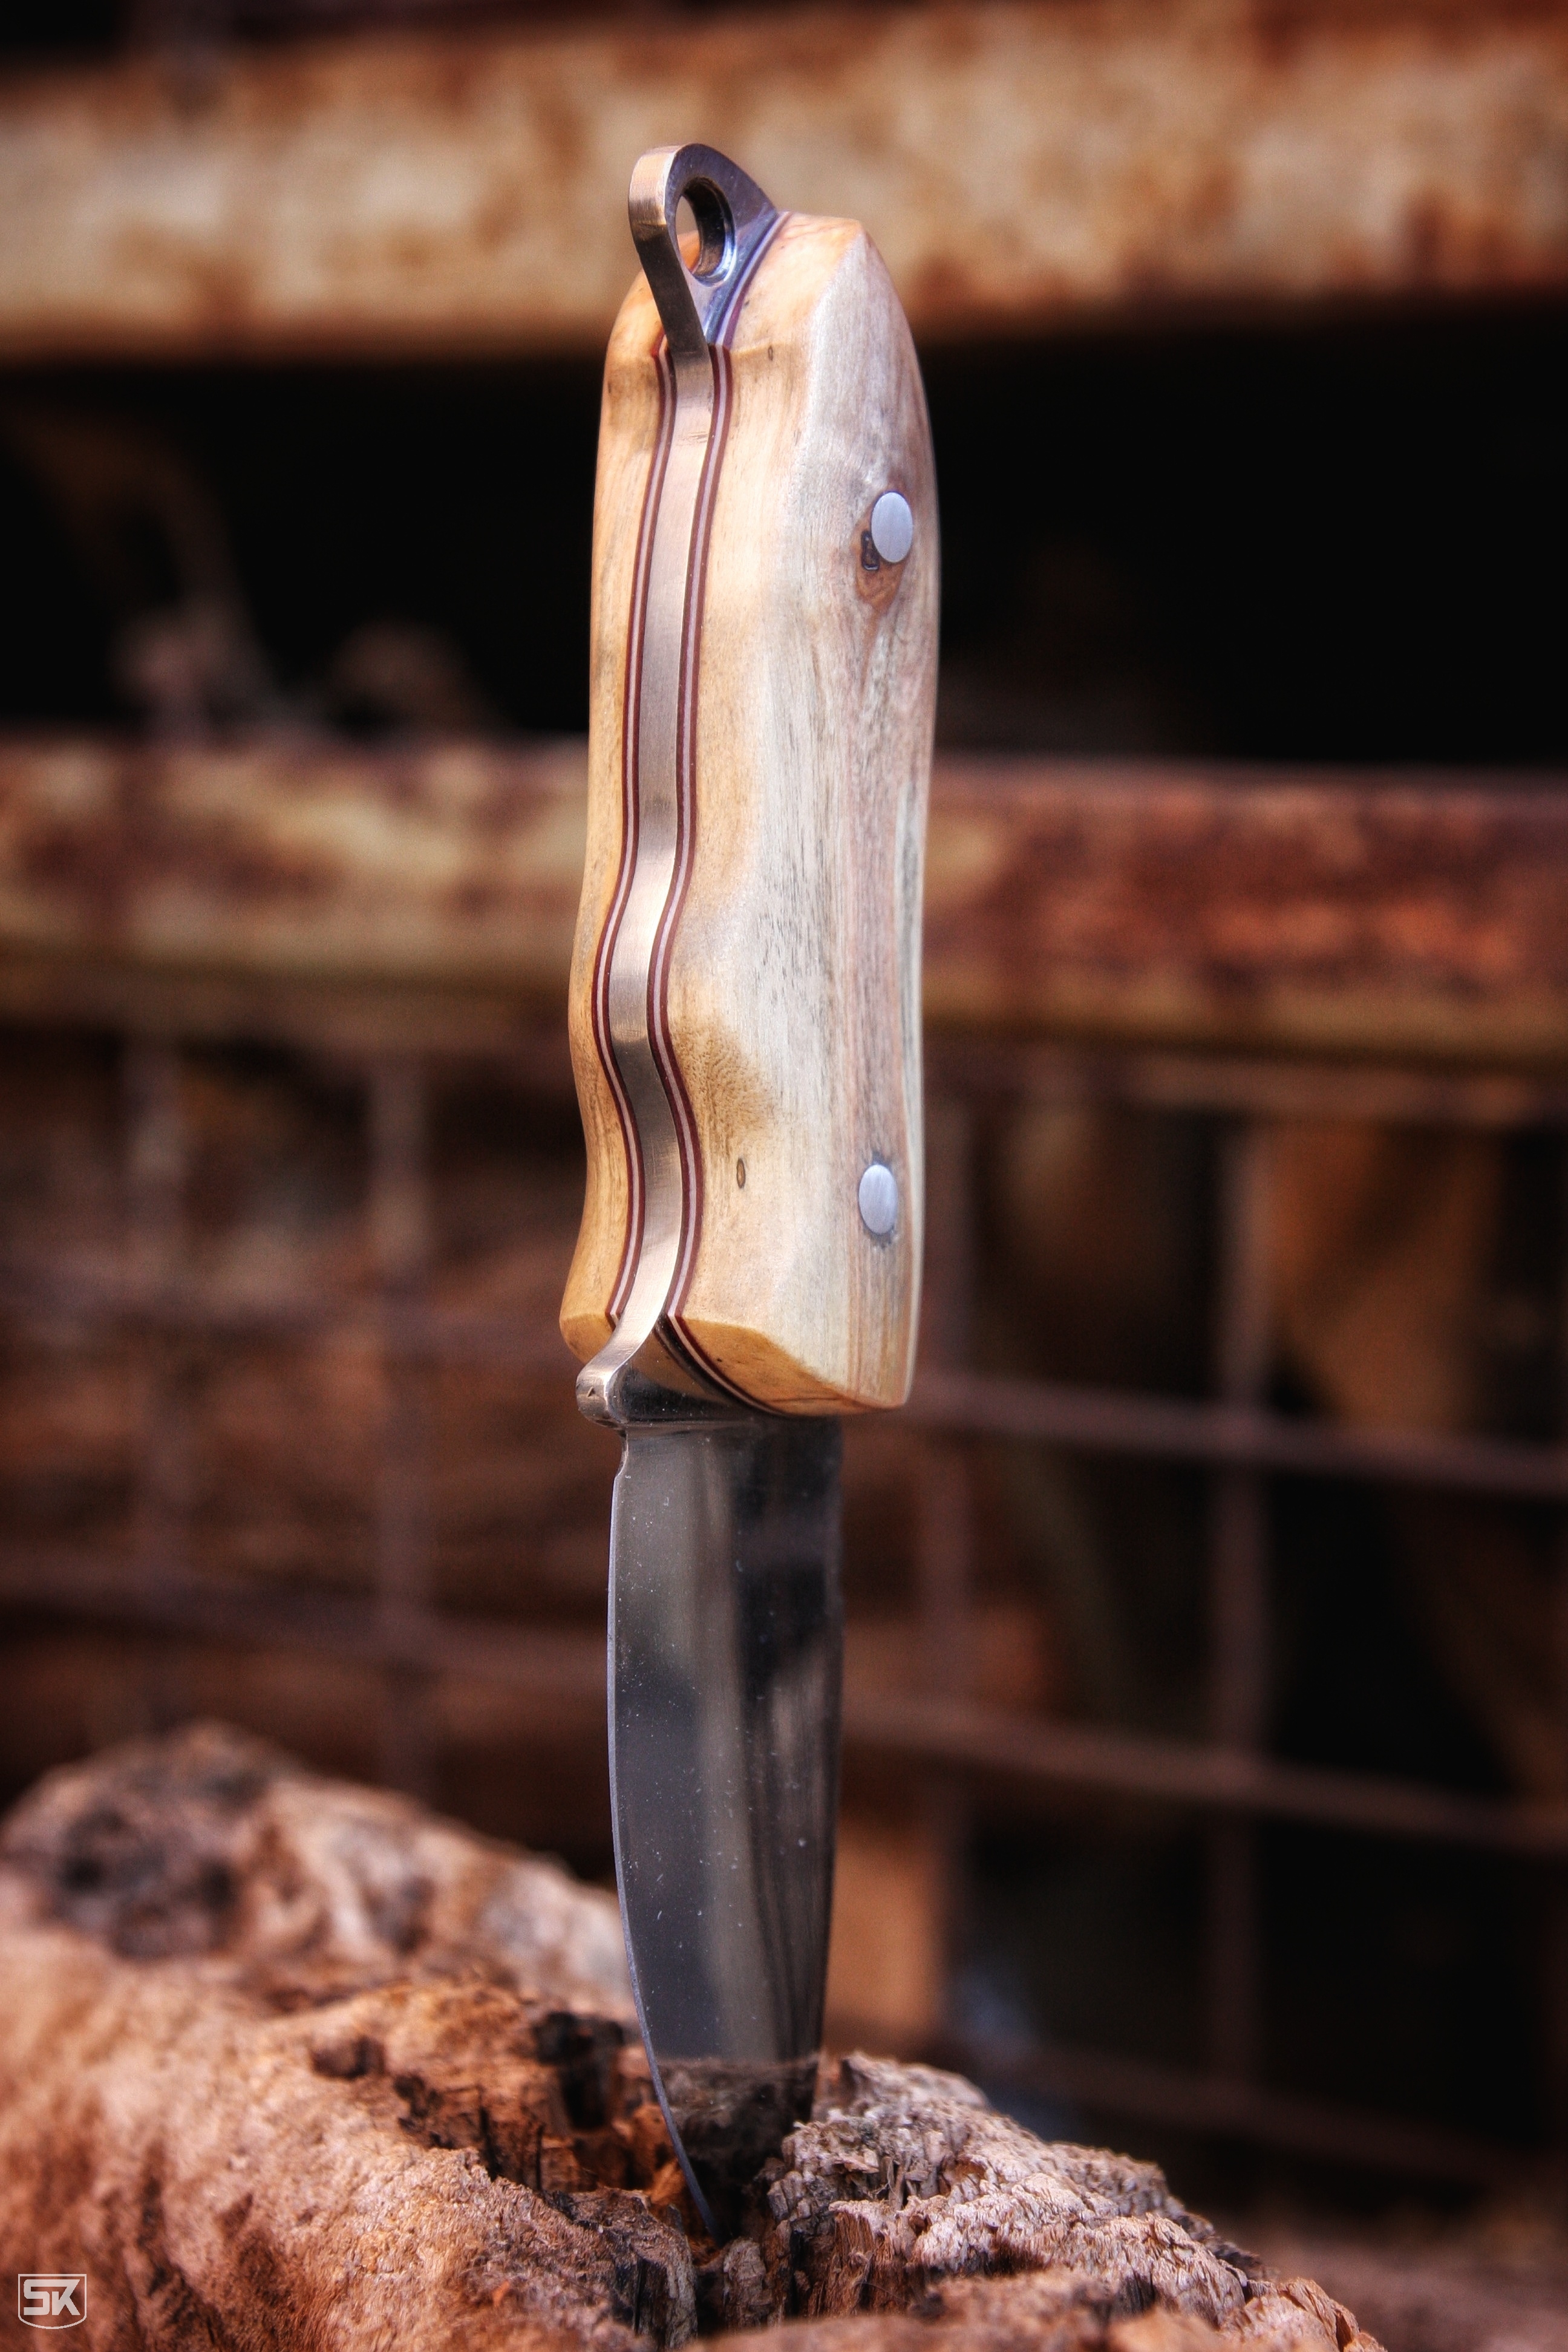
For the handle, I had something special in mind. I had bought some nice woods for the handle halves – Karelian birch and leopard wood. I planned to do a two-part handle and separate the woods with some self-made vulcan fibre and brass plates to get nice golden lines running around the grip.

I put the parts for the handle together with epoxy and let it dry over night. The results looked nice … but … unfortunately I saw that at the brass parts did not stick good enough and broke apart from the wood. So I ripped everything apart and did the handle without the brass. That worked out good after another night of waiting for the epoxy and so the next part was to put the halves on the blade.

Karelian birch and brass pins

I had used my battery powered drill to put the holes for the pins into the blade before the heat treat and I did the same to drill through the wood. And yes I am an idiot: the holes were not nice perpendicular to the blade. As I had not any wood left for the handle I put that learning aside and decided to finish the knife even with this flaws. Before I continued with the handle I sanded and polished the blade to a mirror finish.

I put everything together and let the epoxy dry over the night. So I was ready to grind the grip into shape the next day. That worked out very good and the result felt good in my hands. So next was hand sanding the grip up to 240 grit, watering the wood and hand sanding again after it dried. To protect the wood I now used three layers of boiled linseed oil.

And so close to finishing the knife I learned another big lesson: sharpening a strongly convex beveled blade is very hard to do if you want a nice sharp blade. I just could not get an angle flat enough without taking away some of the bevels. In the end, I was able to do the paper cutting test – but lesson learned.

My first knife

I liked the shape of my aluminium-grinder-test-dummy-knife so much, that I decided to do the exact same knife out of real steel. I had ordered some 1.2003 (C75) steel at a knife makers online shop together with some black and white vulcanfiber sheets and a diamond sharpening block.

The stuff arrived pretty quick and when I got home from work I immediately went to my workshop. I threw the aluminium dummy on the steel and transferred the form on the steel with a sharpie. Finally I could try out all the techniques I learned in the Videos, like cutting out the form with an angle grinder, shaping the edges with my belt grinder and finally grinding in the bevels.

As it was my first knife I did not even think about grinding the bevels free hand. So I built myself something out of a small block of wood where I ground one side to an angle where I could hold my knife to. And then I started grinding. For me the bevel grinding is the most difficult part.

The first results turned out pretty good – until I unintenionally took the wrong side of my bevel-grinding-wood-block and ground an ugly vertical line into the plunge. After fighting my self hate I took a sharpie and drew big black arrows on my wood block to save me from my idiotic self.

I managed to correct my mistake by grinding all over the side of the blade and finished the bevels with a nice flat angle. Next was drilling the holes with my cordless screwdriver and I soon learned, that I will need to buy some decent drill bits. Just to try it out I filed a grooved structure on the spine for the thumb. Lastly I polished the blade, just because i could.

As I had no wood for the handle I took some firewood I cut roughly into shape and cut in halves with a hand saw. For the pins I had bought some steel and brass rods and pipes of different diameter. I chose 5 mm steel pins.

I did not want to sacrifice the new vulcanfiber for the first knife so I decided to do my own. I built some motorcycle parts out of carbonfiber in the past and I have a good amount of epoxy left – also I have some experience in hand laminating – and I have colored cardboard from my kids – so not a big thing. I chose wine red and white cardboard (or more a thick paper around 130 g/m²) and laminated them together with the wooden grip plates.

My epoxy is pretty slow so I had a 12 hour brake…

The rest was simple. Cutting off the vulcanfiber to have it in line with the wood, drilling the holes through the would and getting the first finish to the plunge side of the grip and at the heel – I had decided to do an eye for a chain or something on the heel of the grip.

I glued everything to the blade with epoxy and again had another brake…

Last thing to do was getting the handle into shape – man I loved how my vulcanfiber turned out. To protect the wood I used an alcohol based varnish I had from oil painting – not a good idea. The next knives will be done with boiled linseed oil.

Getting my feet wet

Honestly it all started when I watched a DIY video. I cannot remember if it was on facebook or youtube. It showed someone making a simple little knife from an old rusty saw blade.

I came back to the subject months later and watched some of the great YouTube channels like Alec Steele, Freerk Wieringa, Michael Cthulhu and RvD Knifes. Especial RvD Knifes was very inspiring because of it’s more manual and simple approach without expensive tools and big workshops.

I planned what tools I would need for my start to try out making an easy knife. First I got a little desk belt grinder, a vice, a set of files and some clamps for my birthday. As I had not yet got a piece of knife steel I searched my garage and found a bar of aluminium from an old door. I took a pen and drew a simple knife form on it. I cut out the form with my angle grinder and then tried out my new belt grinder to rough in the form and grind the edges.

I even tried sharpening it but that did not work out too well.