


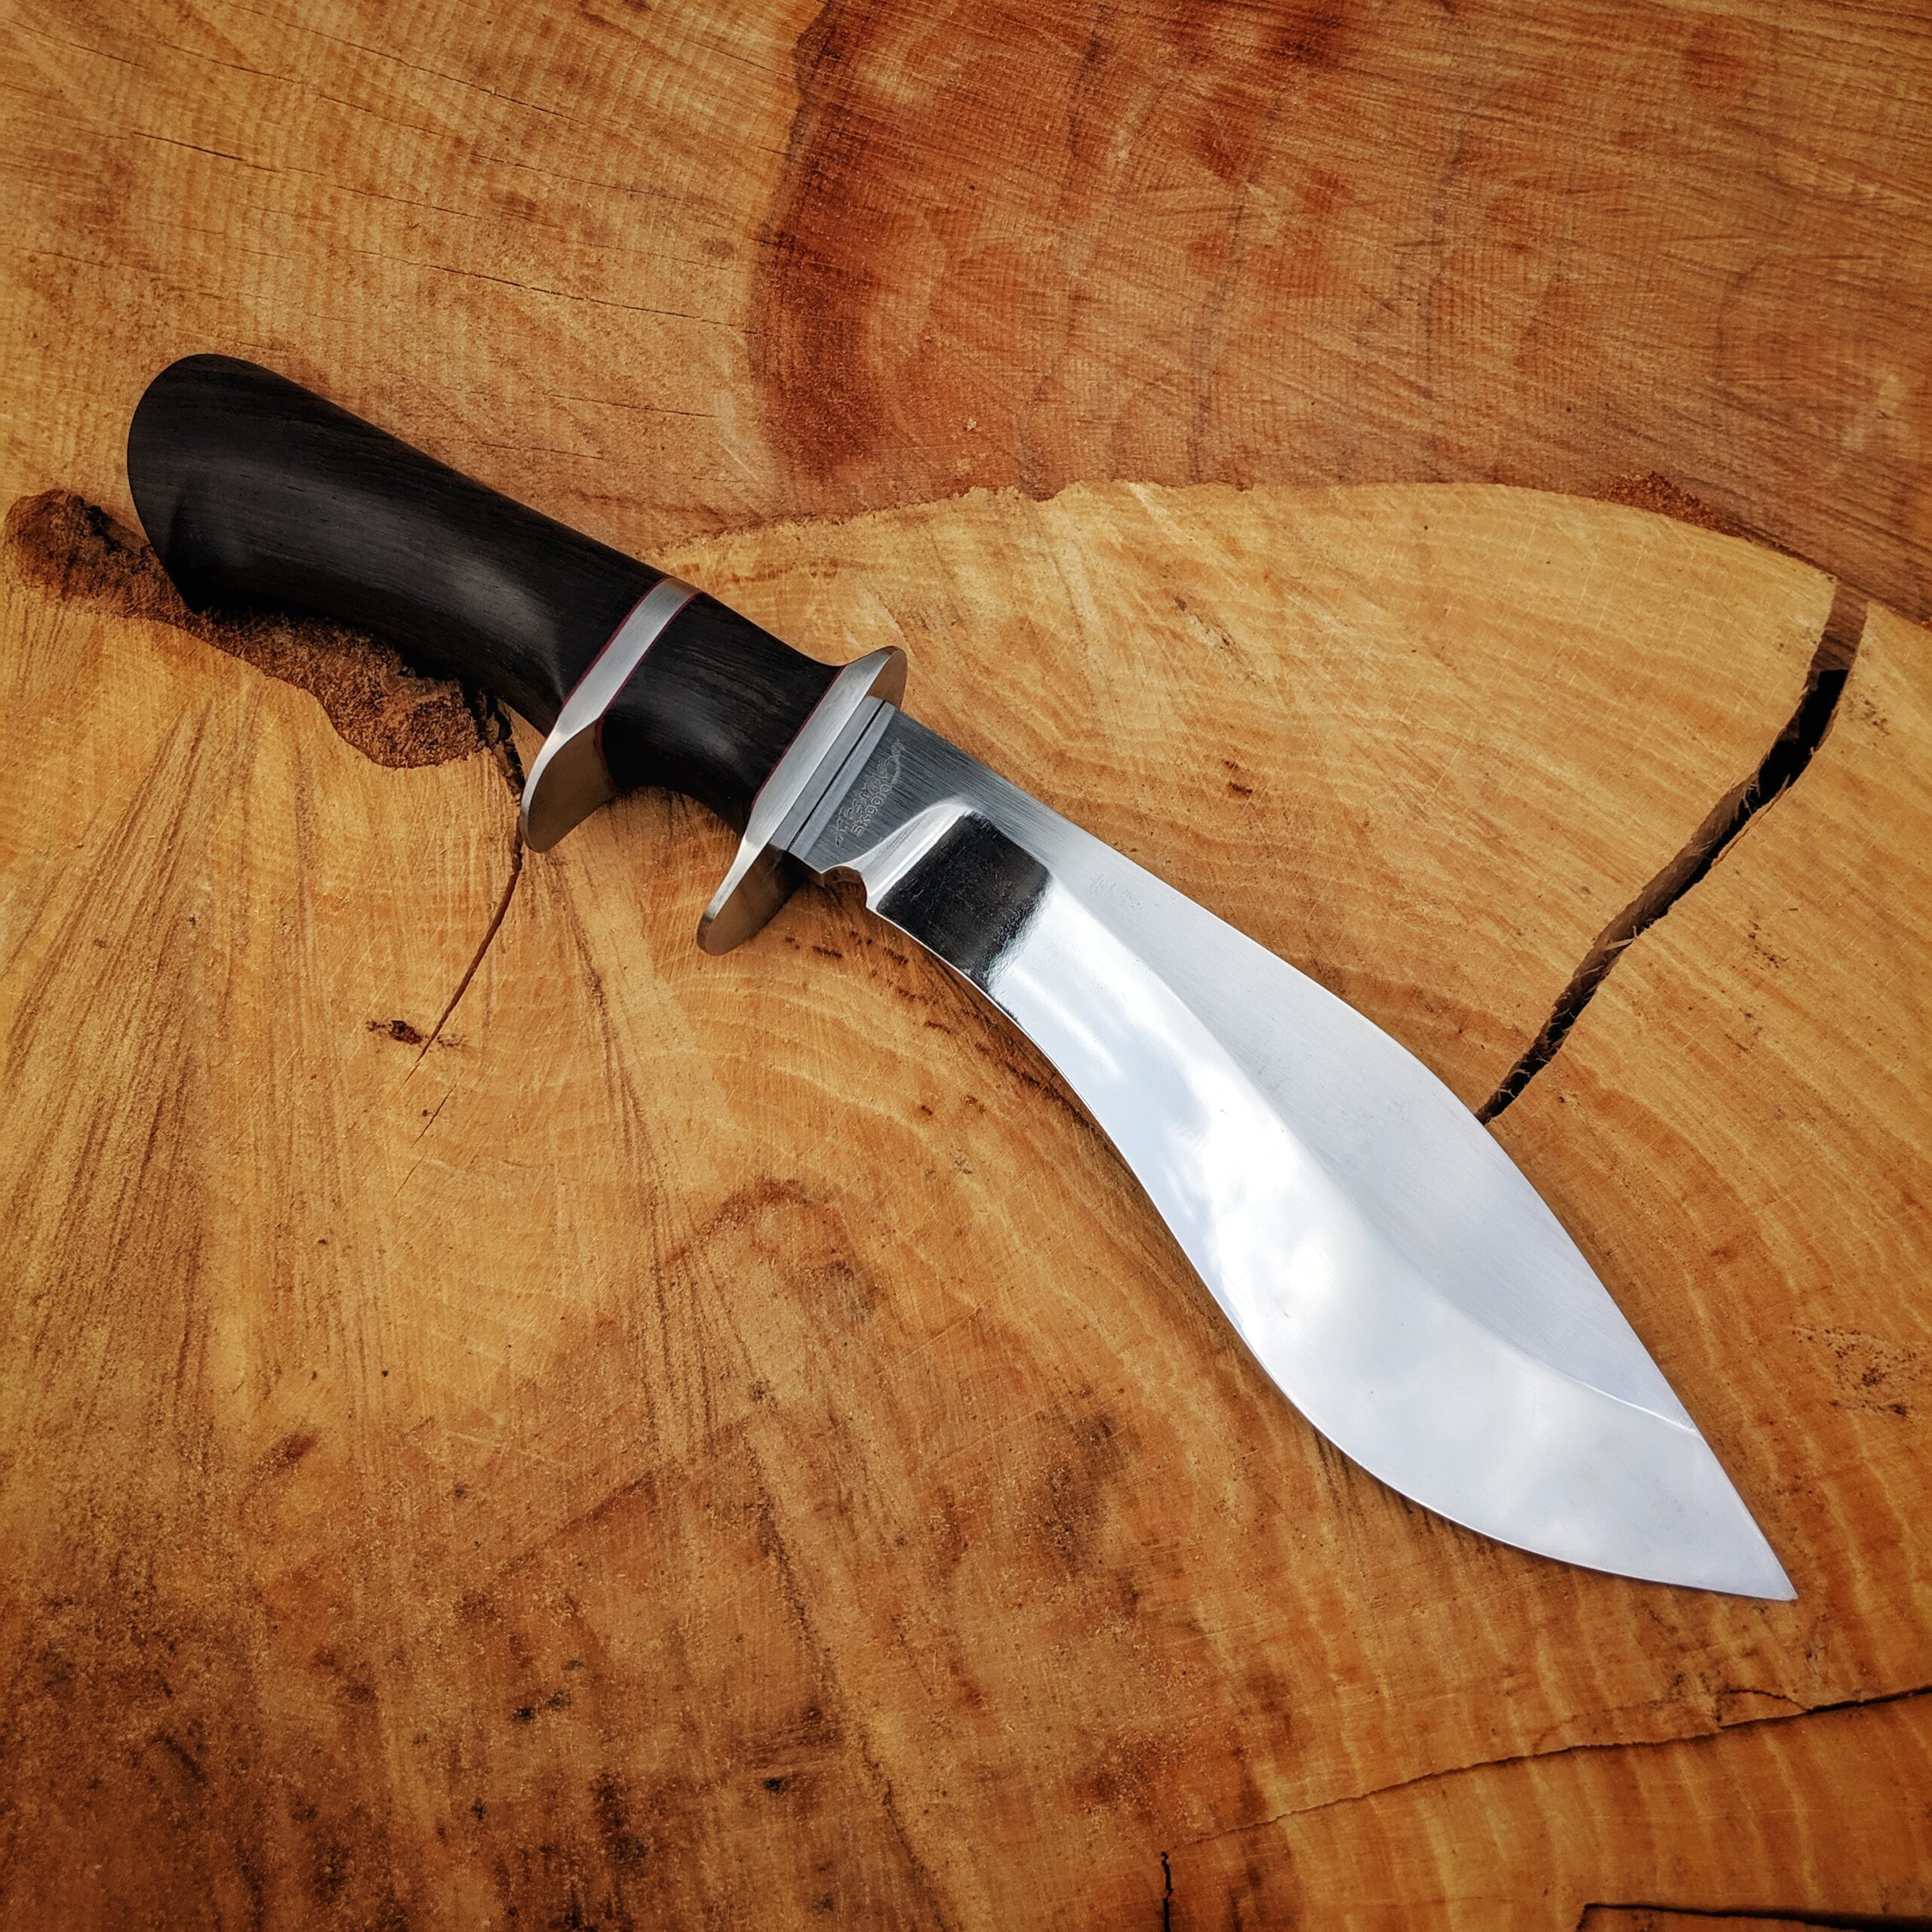
The second knife I ever made was a Kukri and my fascination for these knives is unbroken. Fortunately, I got an order for a Kukri with all the freedom to design and make the knife as I wanted it. That is a lot of trust in my craftmanship from my friend and customer Joe.
So I started designing a western-style crossover between a hidden tang Kukri with a primary guard and secondary guard. I sent the concept drawing to my customer and we agreed on a price so the new project had a go.
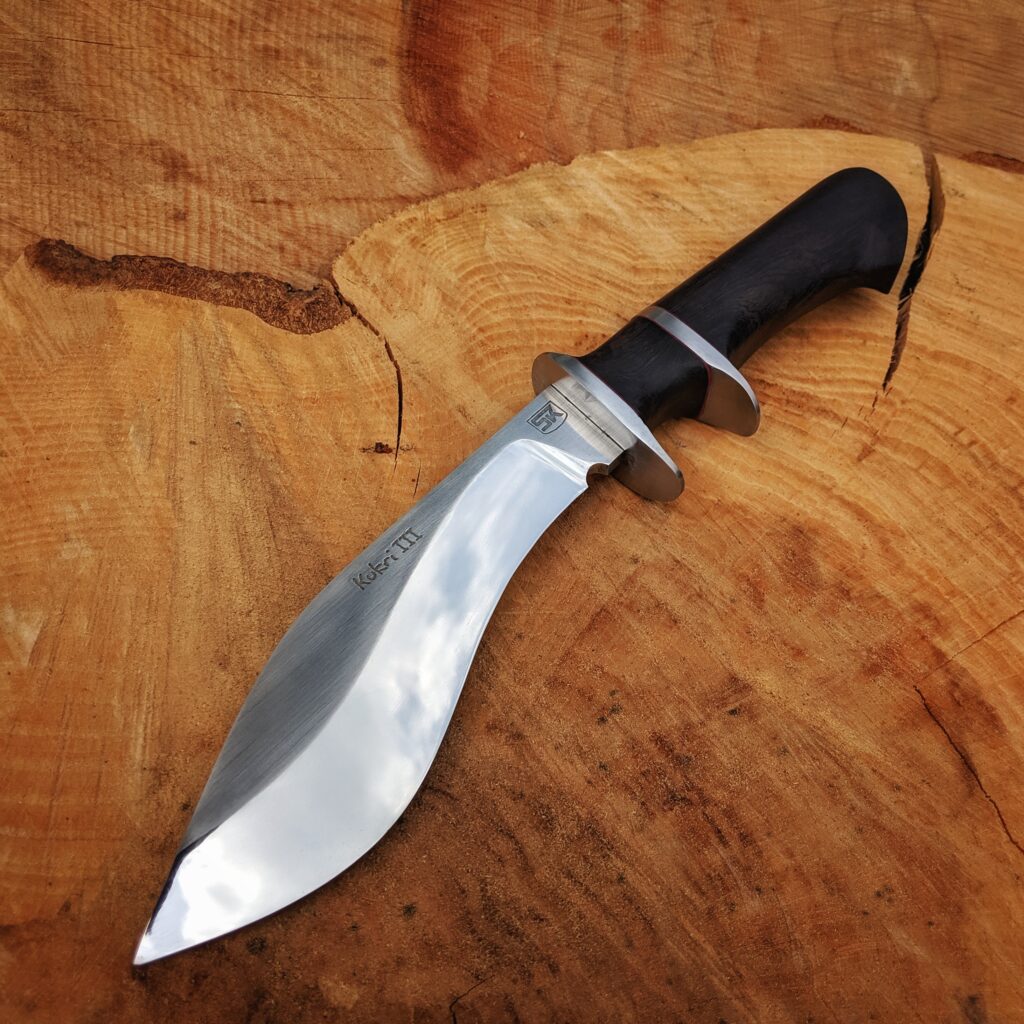
One of the most difficult things on a kukri is grinding the complex curves of the bevels. I chose a 5 mm thick 1.2510 steel so there was a lot of material to be removed. I collected the steel dust with some strong magnets and put it in a cup that filled up quite high.
The Kukri III will have a blade that is 1 cm longer than Kukri II and the blade will be a lot thicker. What helped me a lot was, that I found a new type of belts for my little grinder which removes a lot of material and reduces the time I need to grind the blade into shape.
After the bevels where finished, I got my professional belt grinder which would have made things a lot easier – but fortunately, it still helped to give the blade a nice surface finish. I am looking forward to using the grinder for bevels on my next knives.
For the handle, I bought a piece of nice black ebony wood. This wood is so heavy but also so beautiful. The piece seemed to have a perfectly even structure.

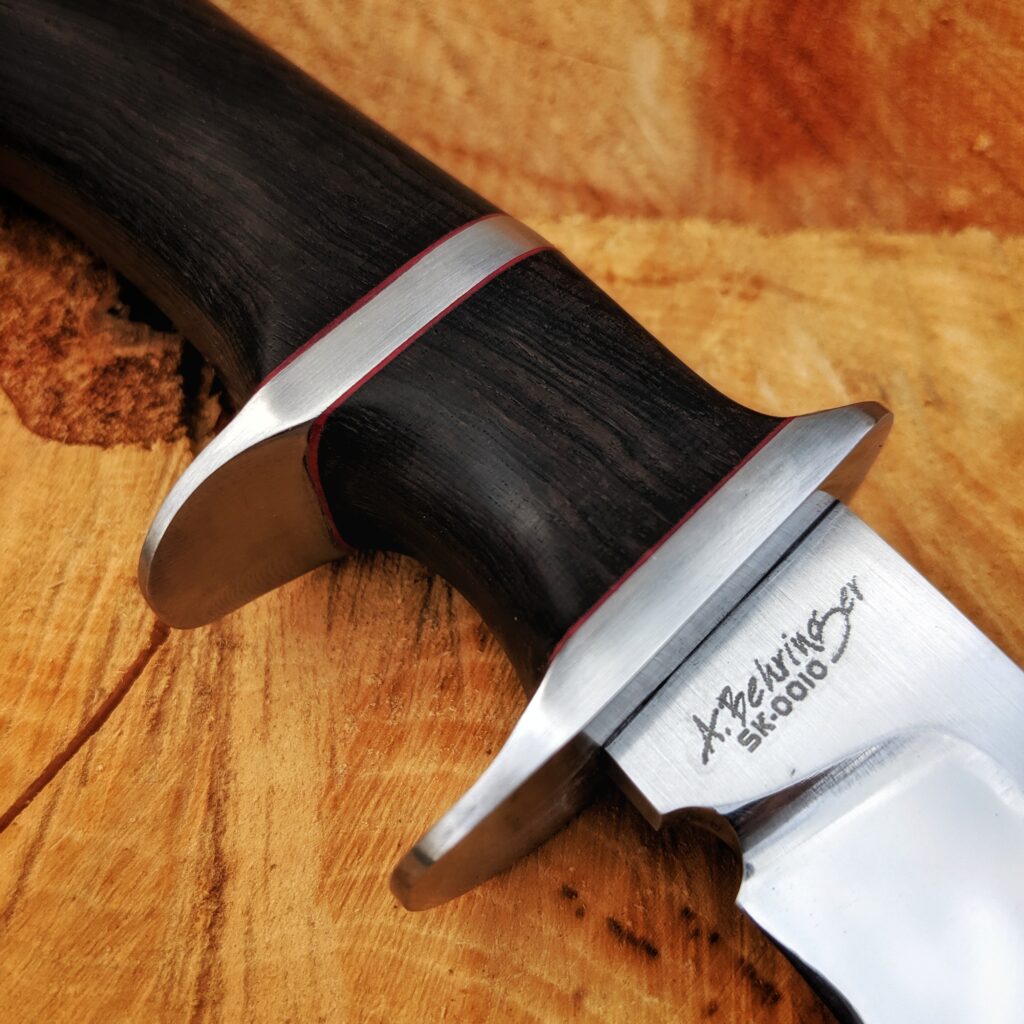
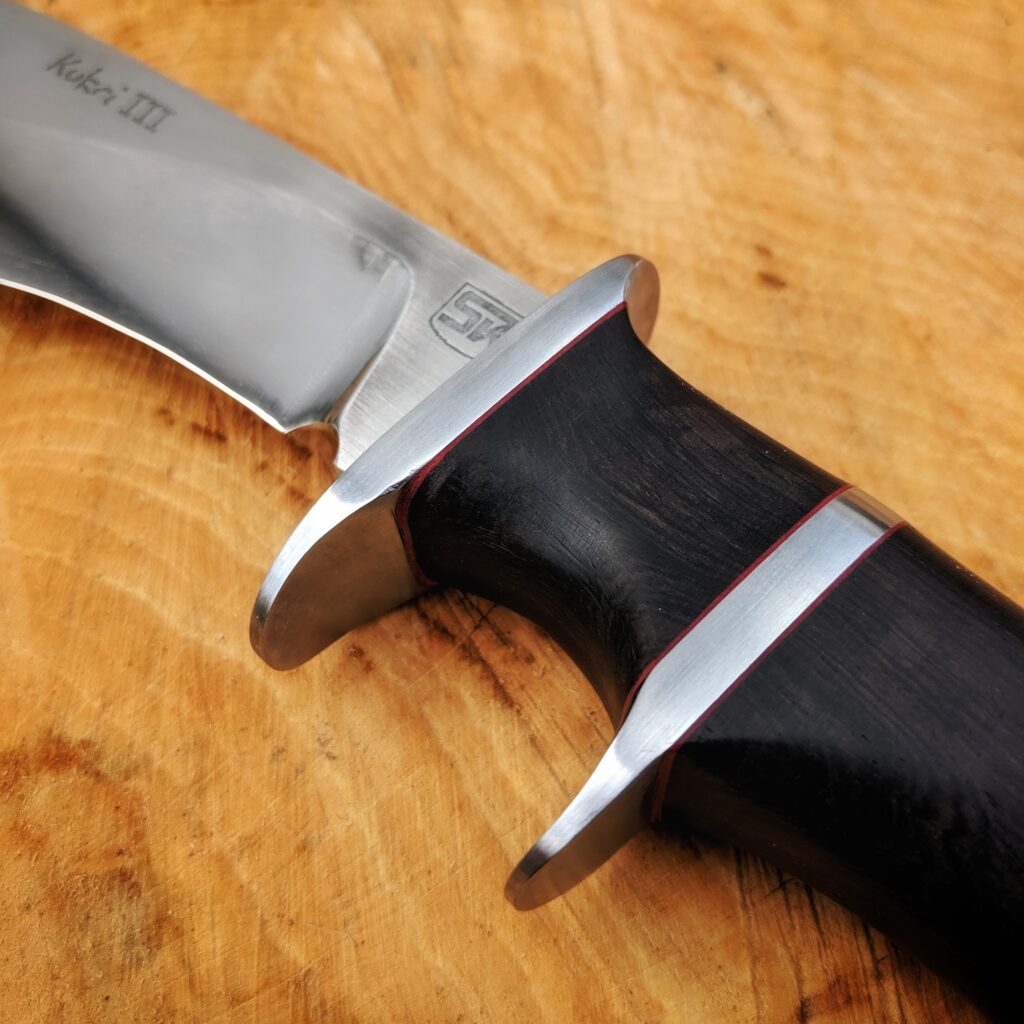
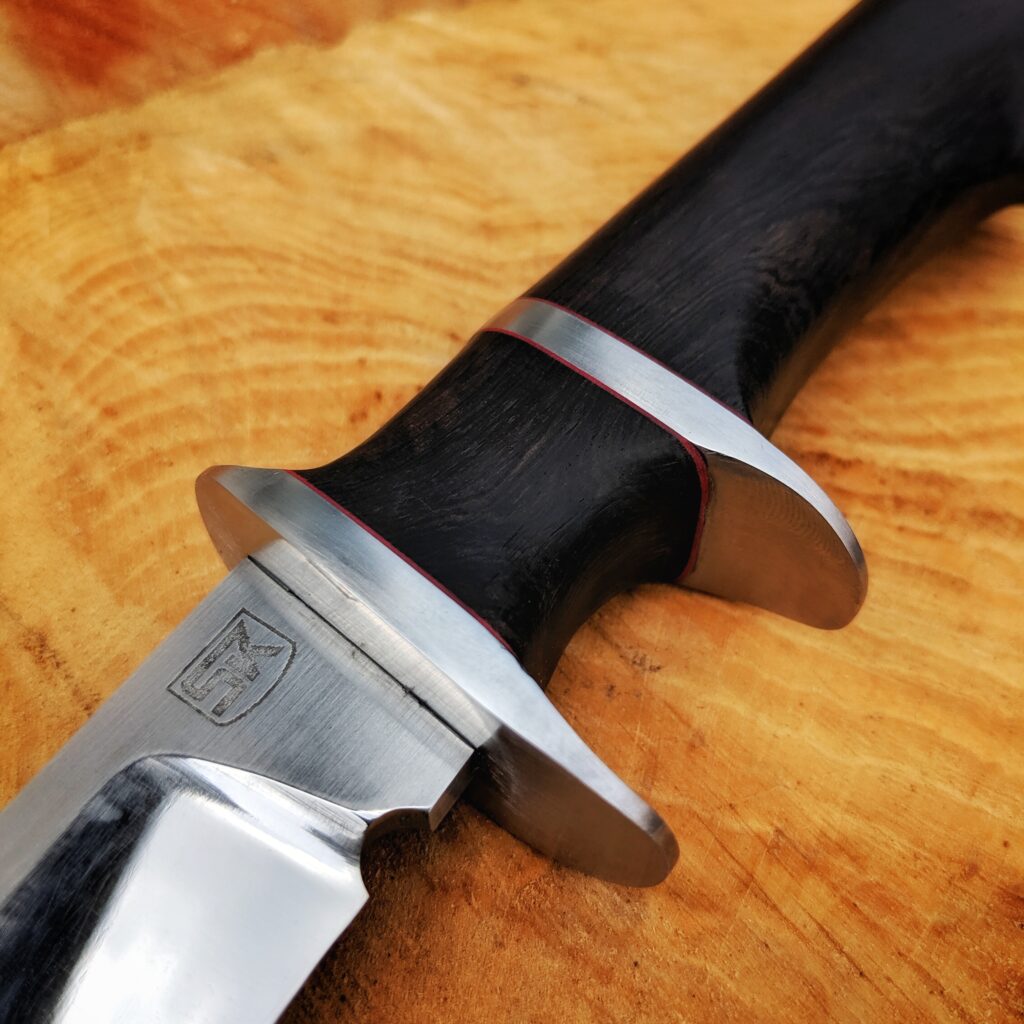
This project took me ages and a lot of work I spent was put into the surface finish of the different parts. If I do such a project it has to be the best I can and I always ad a detail I never did before. Here I added three things, first I never worked with ebony wood – and boy this stuff is hard. Second I did a long secondary guard and I wanted to have red liners on this hidden tang handle.
The surface finish of the blade took me very long. I wanted to have mirror finish bevels and a scratch pattern on the rest of the blade. It was hard to get to the mirror finish and I blame it on the steel that was hard to grind after heat treatment. But finally, I got it to a degree I was happy with. The etching and regrinding of the blade went perfectly.
The second thing that took a long time was the secondary guard. Shaping the handle after putting everything together is pretty hard to do because it is easy to scratch the guard. Then you redo the surface finish of the steel of the guard but have to watch that you do not touch the wood again. In the end, you want a silky touch handle and a guard with a nice scratch pattern. This is also hard to do on the inside of the primary guard, too.
The third thing was the liners. I never did a hidden tang with liners between steel and wood. But the idea of having red lines between the shiny steel and the black wood was intriguing. So I tried and it came out well. By the way: gluing up a handle of four parts – plus laminating the paper micarta in place between the parts was a bit nerve-wracking. And after everything is put together you cannot really see if everything is lined up perfectly. So I used a rubber band as a centerline marker to line things up.
After all, I am pretty happy with the results and I learned a lot. Ebony is an awesome material and gives the knife a very exclusive touch. The next step is the leather sheath, but this will be an extra post…